
As a tournament admin, once you are done drawing the brackets, it is time to create the fixture for the matches.
Instructions
1. Go to mynextmatch.com and provide your login details to continue.
2a. While in the Lobby, click on My Organisations.
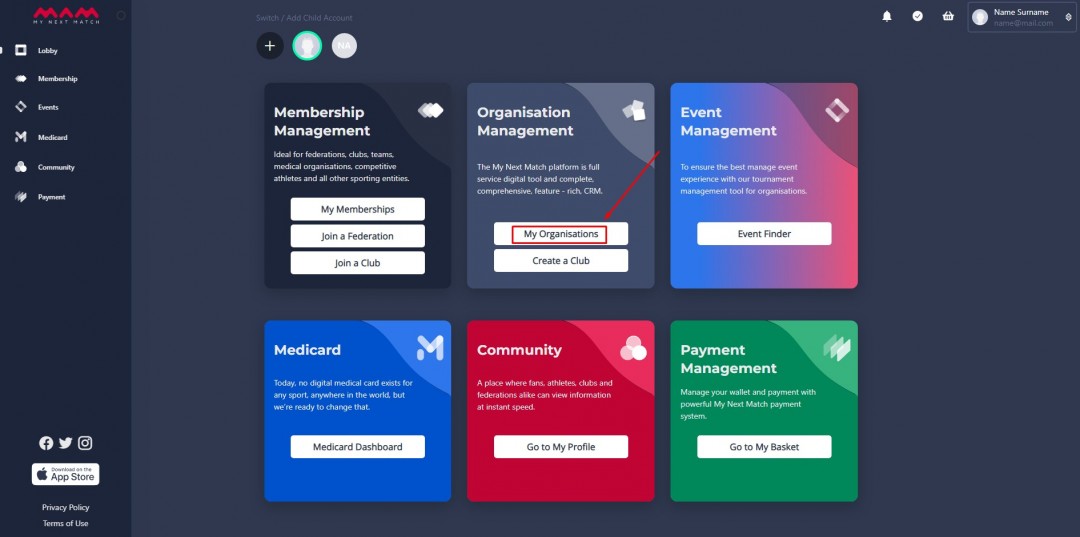
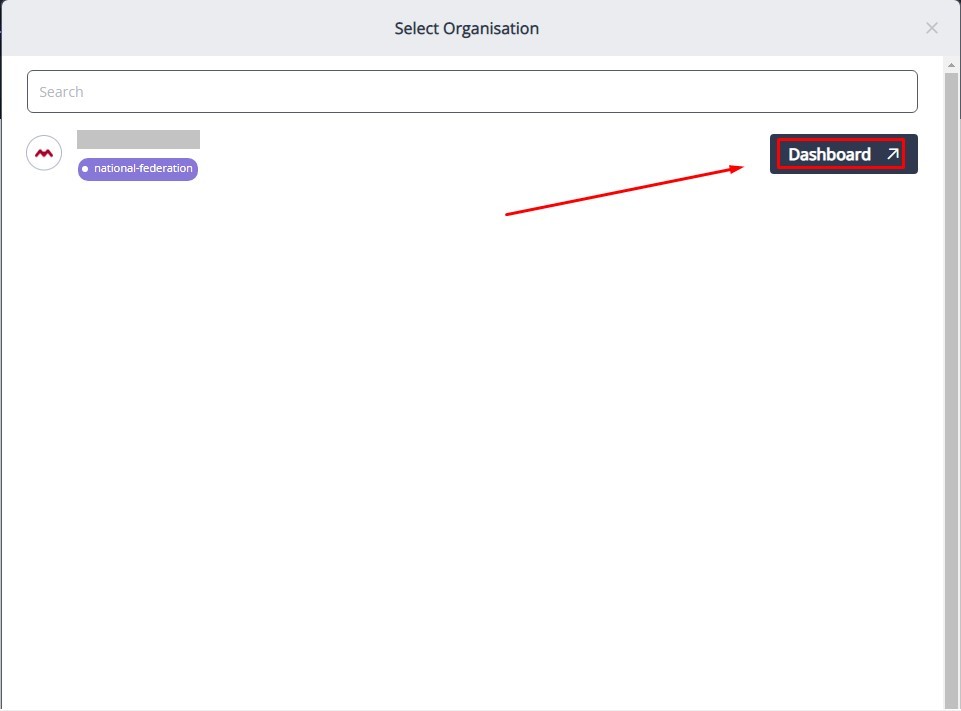
2b. Click on the Dashboard of the organisation where you are an admin.
3. Click Events from the side menu.
4. Click on the edit icon (it looks like a pencil) on the top right of the tournament.
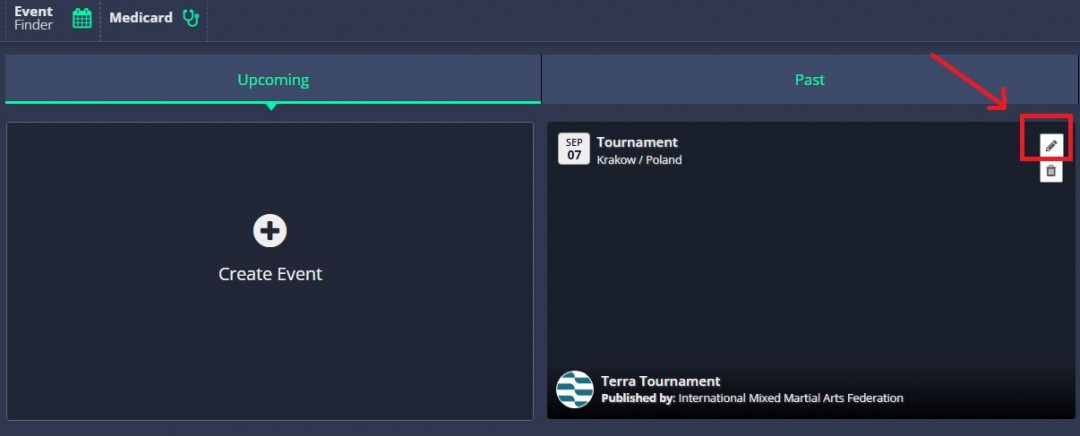
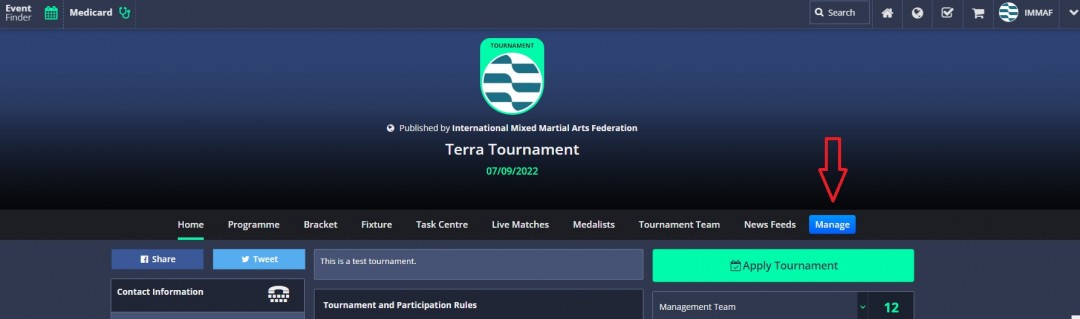
- Alternatively, you can click on the tournament itself, and then click on Manage on the new window:
5. On the dashboard;
- Click on Management to view the drop-down menu,
- Then, click on Live tournament,
- Finally, click on Fixture.

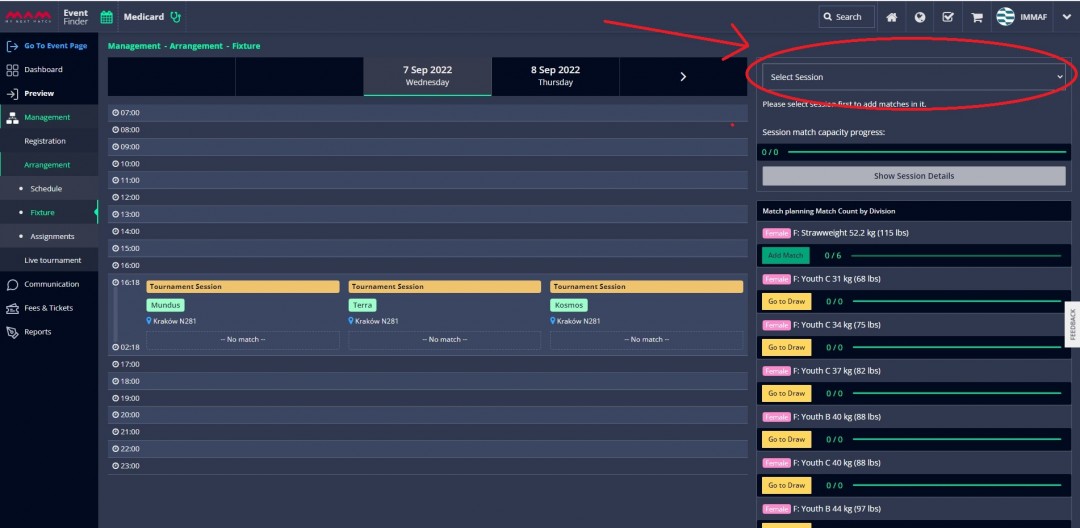
6. On the Fixture screen, select your session by clicking on the drop-down menu, on top right, that says Select Session:
7. Next, let's activate the cages by clicking on the No Match sign in the cage boxes:

- The blue No Match sign indicates that the cage is active, but that there are currently no matches being played in it. If you leave the No Match sign greyed out, the system will not assign any matches to that specific cage.
- In the example above, there are three active cages: Mundus, Terra and Kosmos. In this scenario, the system will automatically assign matches to the very first cage.
- If you want to start assigning matches to a specific cage, you can grey out the other cages. In a moment, we will learn about a more practical way to change cages.
- It's also perfectly acceptable to only have one cage for the entire tournament, or to have multiple cages while activating only one of them. In that case, you don't need to worry about changing cages at all.
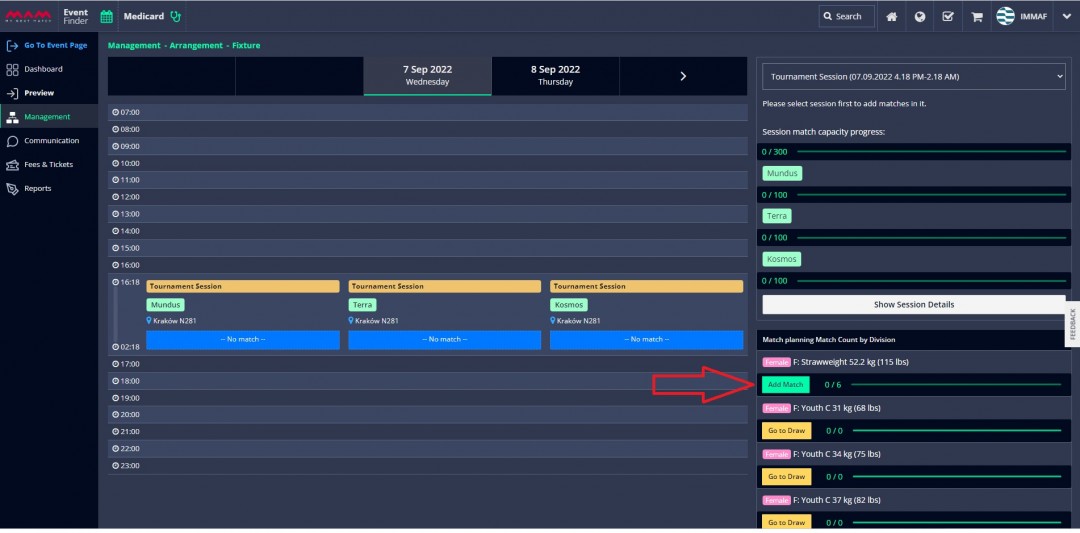
8. Now let's try adding matches. If you look at the bottom right of your screen, you will see your divisions.
- If you have drawn the brackets for them, they will have an Add Match button next to them, meaning that they are ready for the fixture. If you haven't yet drawn the brackets for a specific division, you will need to do that before proceeding.
Now let's click on Add Match for the divisions we previously drew the brackets for:
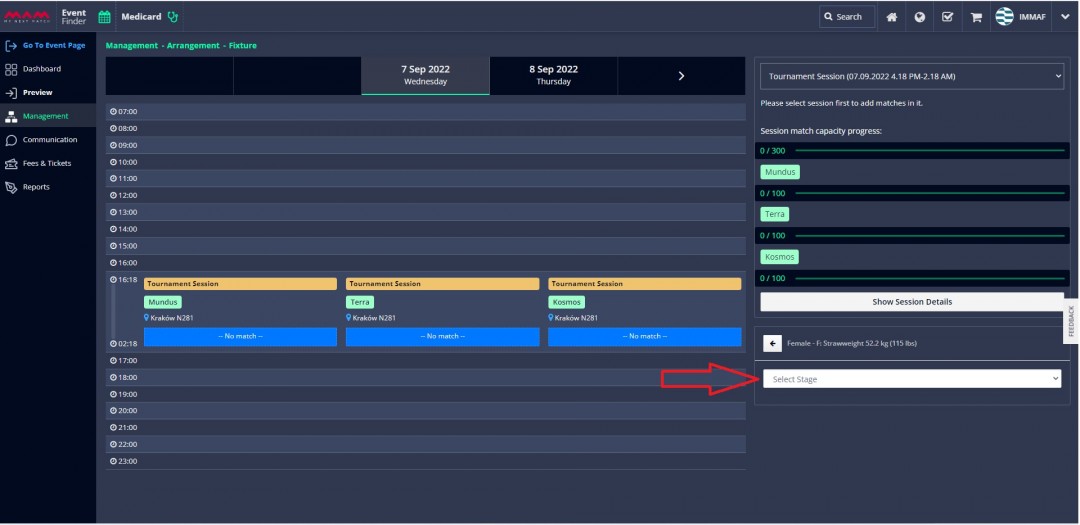
9. Click on Select Stage for the drop-down menu.
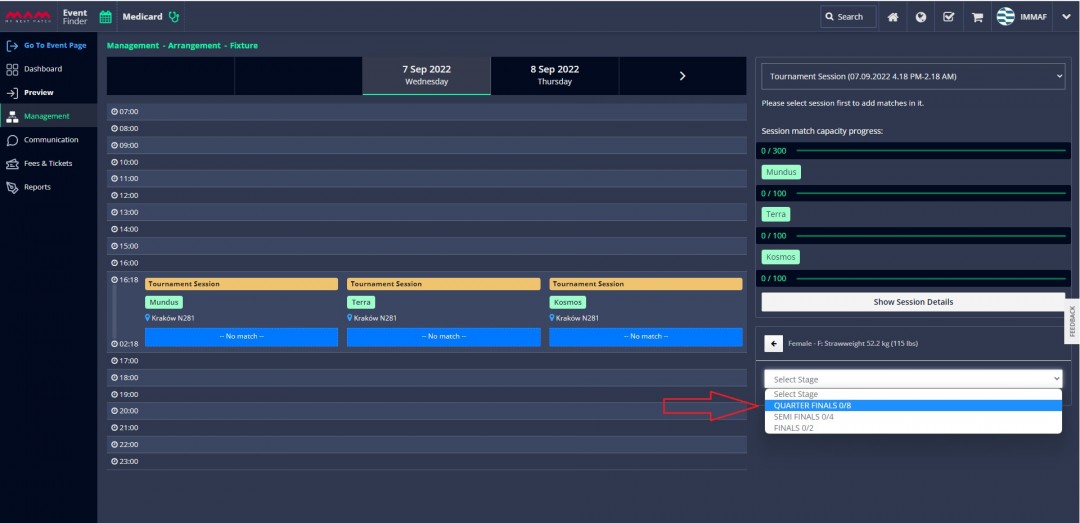
10. The stages have their default names depending on how many athletes are competing. You are free to change the names, though. Let's select Quarter Finals, first.
(Note that if you have more than 8 people competing, you will see further stage names. In our example, we have fewer than 8 people, so we start from Quarter Finals.)
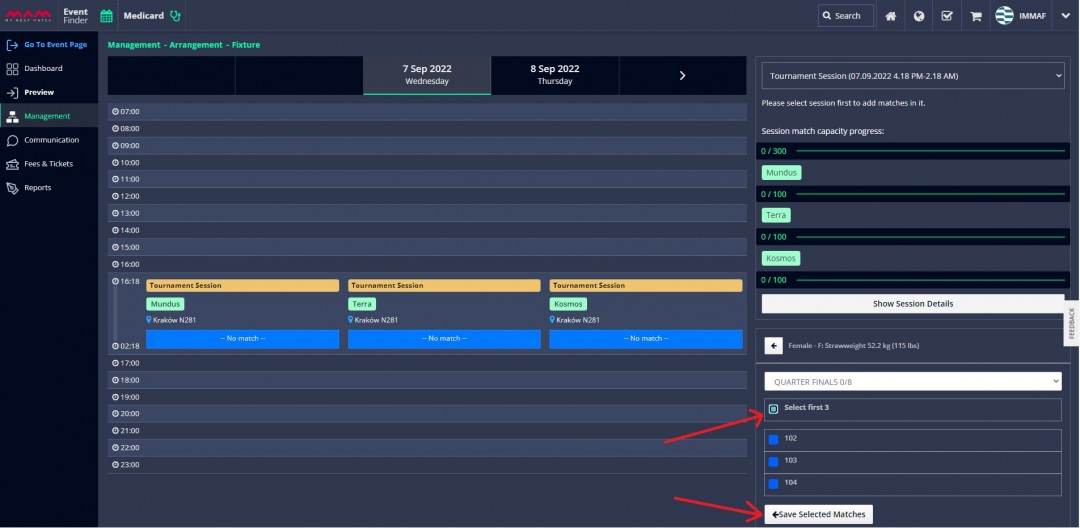
11. This will bring up the matches to be played in this stage. You can select one, all or both at the same time. If you select more than one or all of them, and then click on Save Selected Matches, they will all be moved into the first cage that is active, which, in our example, will be Mundus.
12. Once the matches are saved, they will all appear on the first active cage. You can also see the time stamp next to each match.
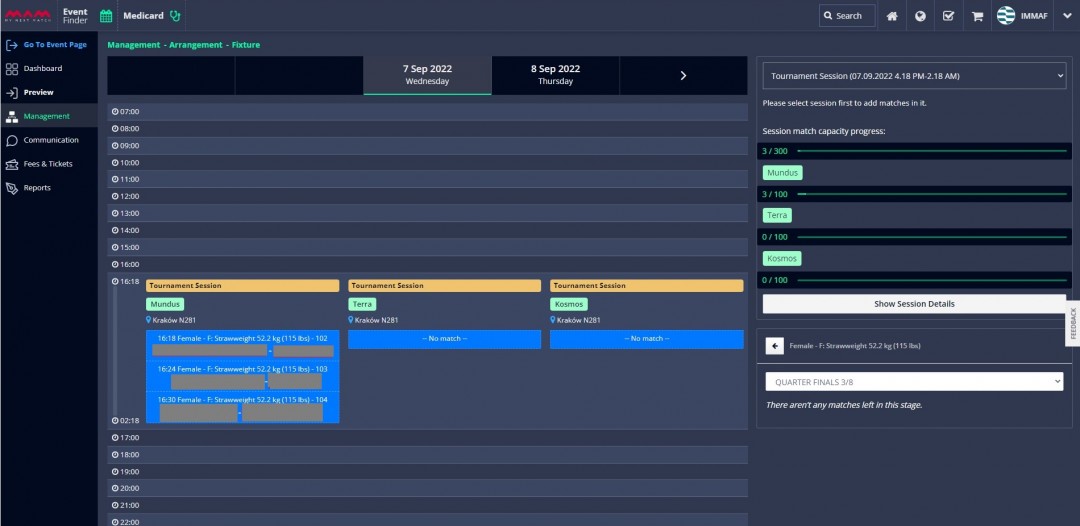
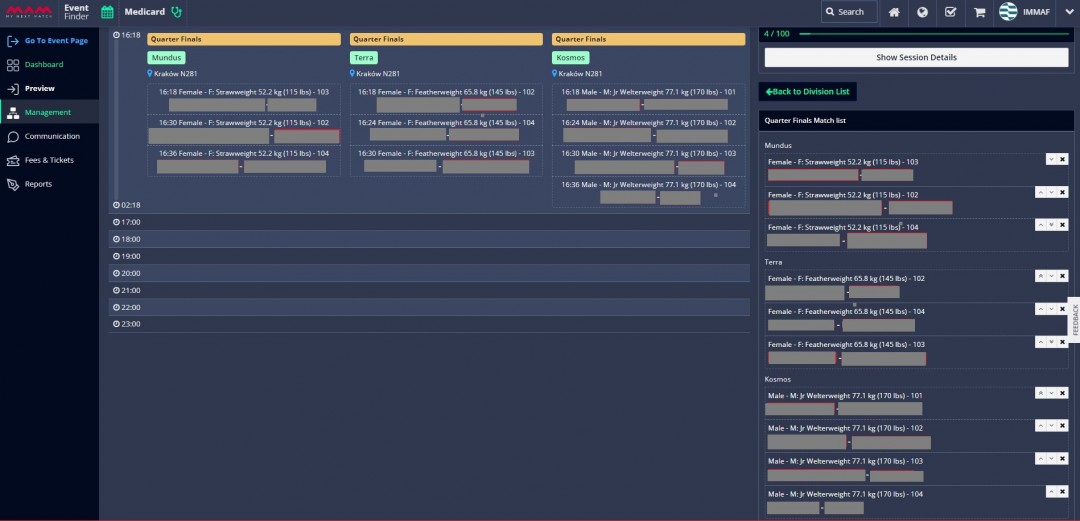
13. Good job! We have added the matches in the Quarter Finals. Now, if you want, you can change the order of the matches, or the cages they'll be played in.
- To do so, click on Show Session Details, which will open a list of the matches to be played.
- Next to the matches, you will see single arrows and double arrows. The single arrow moves the match up or down within the same cage, while the double arrow puts the match in the next cage:

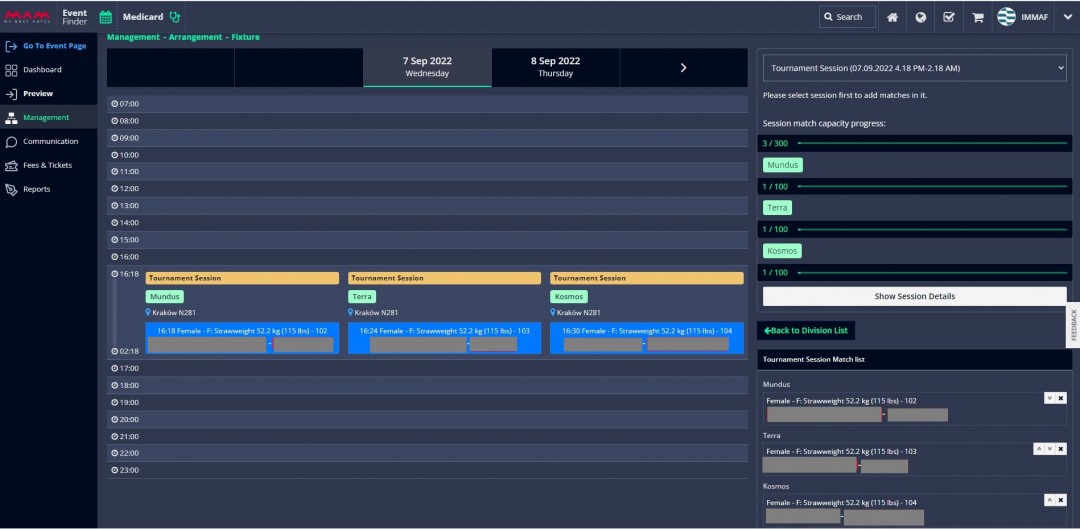
(As you can see, we have distributed the 3 matches to our three cages. This was just to show you the process. In our example, let's use only one cage per division for the sake of clarity. So, back to where we were.)
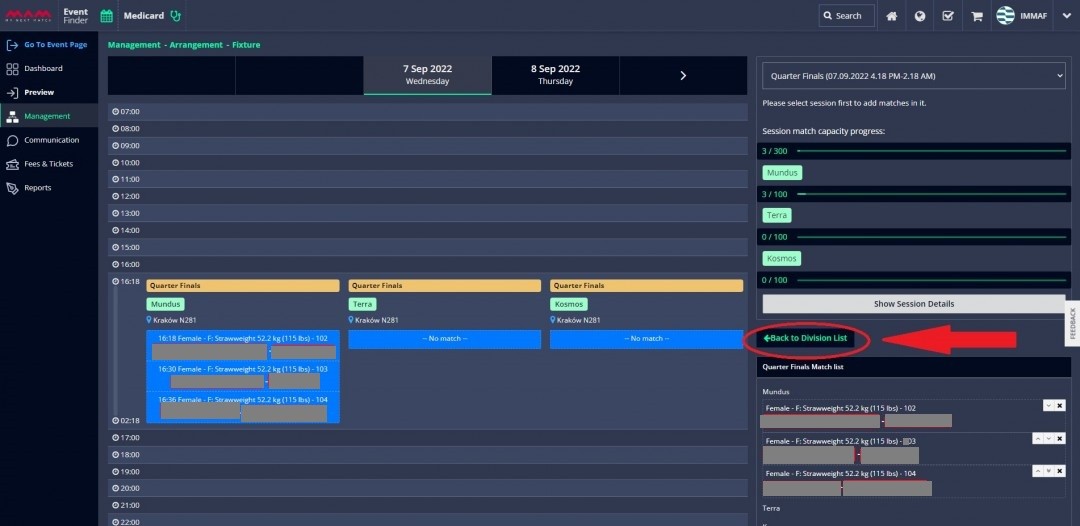
14. We have created the fixture for the Quarter Finals of one of our divisions. Our athletes will probably be tired by then, so let's let them rest until tomorrow. In the mean time, let's create the fixture for the Quarter Finals of a different division in our second cage.
- Click on Back to Division List to see the list of our divisions:
15. Let's follow steps 8 to 12 for two more divisions, so that our cages get filled. In our example, we'll just add the matches for the Quarter Finals on our first day. In the end, our table looks like this:
16. Phew! Good job! Technically, you can add the Semi Finals and the Finals in the same session as well. However, for a more realistic example, let's add the matches for the Semi Finals onto another day. Let's go to the calendar on top and select the next day:
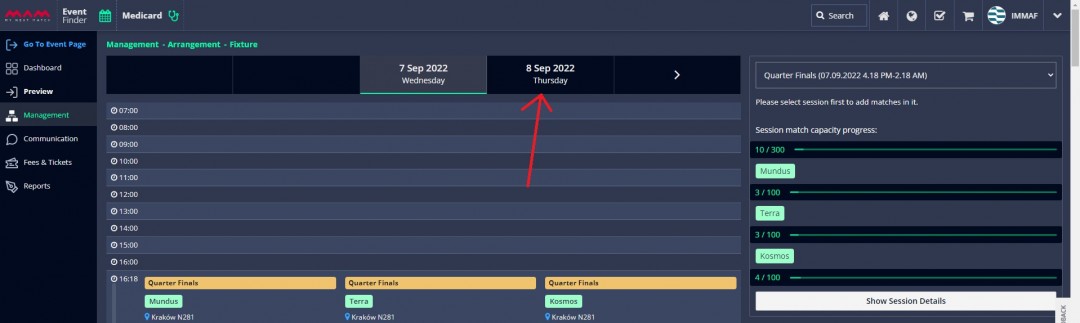
- On our second day, our second session will be waiting for us with empty cages:
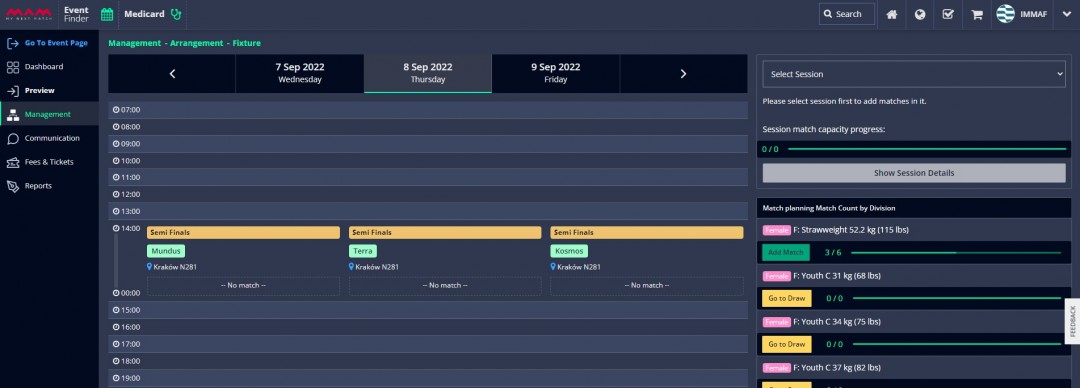
Note: If you don't see anything on this page, that means you only had one session ready, which you have just filled out.
- To create more sessions, go to Management > Arrangement > Schedule. Don't forget to add your cages if you create a new session!
17. Let's fill out our second session with Semi Finals. We will choose the same divisions for which we have created the Quarter Finals fixture. The process is the same, except we will choose the Semi Finals this time:
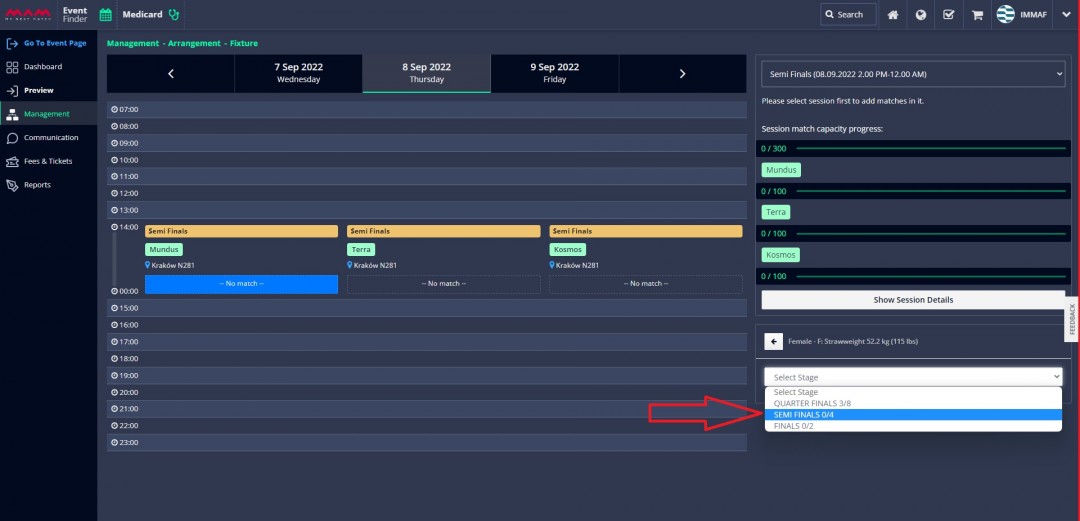
The process is the same, otherwise. Here's our Semi Finals fixture:
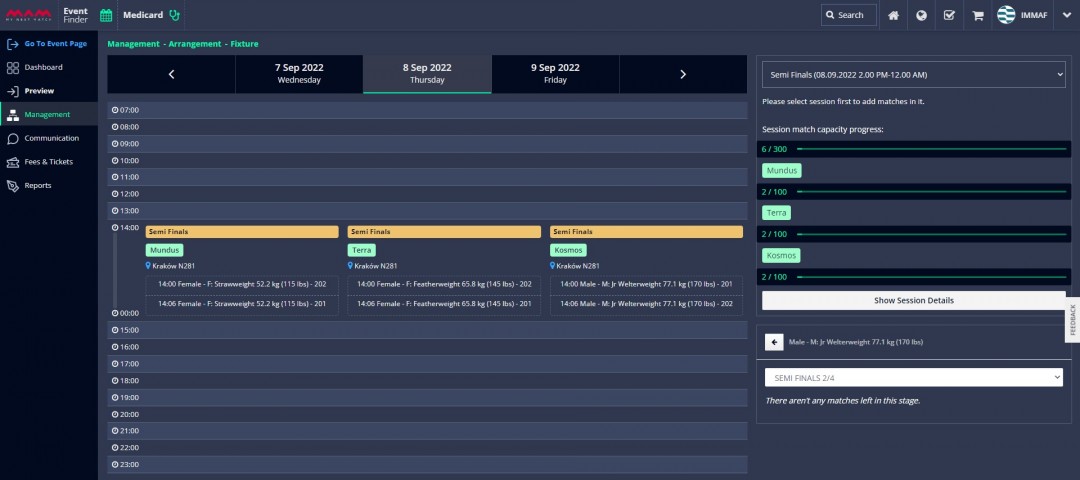
Obviously, at this stage, we have no names since we don't know which athletes will win the Quarter Finals. Once those are over, however, the Semi Finals will automatically be updated.
18. Let's do the same process to create the Finals. Again, don't forget to create a new session if you don't want them to happen on the same day. Here's what our example looks like:
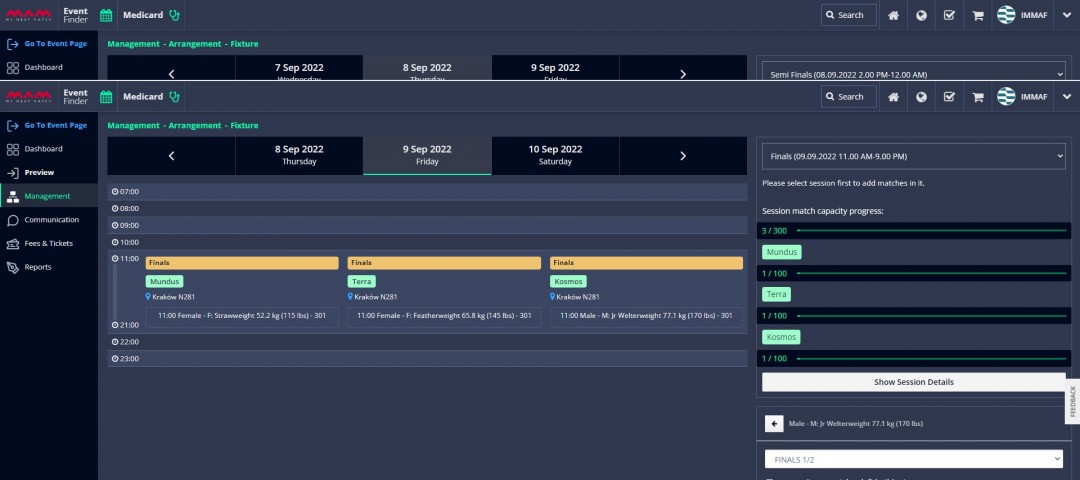
Your fixture is now ready. Great job!
In the next step, you will learn how to manage your matches. Fun stuff awaits!